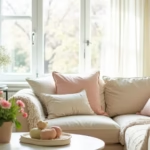
Transform your home with gorgeous terrazzo creations that bring summer vibes indoors! These easy DIY resin projects add vibrant personality to your space while letting your creativity shine. Picture yourself enjoying iced coffee on a custom table that reflects your unique style. Terrazzo’s beautiful blend of colors creates timeless pieces that elevate any room. Discover how simple it is to make stunning, conversation-starting accessories for your home!
1. Classic Terrazzo Table: Effortless Elegance

Create a stunning centerpiece table with this simple technique. The magic happens when colorful chips mingle in clear resin, forming unique patterns on any sturdy surface. You’ll need:
– Clear epoxy resin
– Decorative chips (marble, glass, or quartz)
– Wooden base or old table
Mix resin according to instructions, then swirl in your favorite chips. Pour over your prepared surface and watch your design come alive!
Helpful tips:
– Work in a well-ventilated area
– Use a hair dryer to remove bubbles
– Allow 24-48 hours for full curing
You’ll feel so proud seeing your custom creation take shape!
2. Cheerful Picnic Table: Outdoor Entertaining

Make outdoor meals special with a vibrant picnic table! Refresh an existing table by lightly sanding the surface first. Choose sunny colors that make you happy – think coral pinks, aqua blues, or lemon yellows. Mix these into your resin and pour in playful swirls.
Personalize with pressed flowers or seashells before sealing. Your gatherings will become the talk of the neighborhood! Remember to:
– Apply weatherproof sealant
– Cover when not in use
– Clean with gentle soap and water
3. Chic Coffee Table: Living Room Star

Give your living space a stylish upgrade with a custom coffee table. Start with a simple wooden table from a thrift store or discount retailer. After sanding, apply a base coat that complements your decor. Blend resin with coordinating chips and pour evenly across the surface.
Create matching coasters from leftover materials! Finish with:
– Glossy sealant for shine
– Felt pads on table legs
– Your favorite decor items on display
4. Space-Saving Side Table: Compact Charm

Perfect for cozy corners, these petite tables make big style statements. Choose round or square wooden bases from craft stores. Paint legs a color that pops against your terrazzo design. When mixing resin, combine light and dark chips for beautiful contrast.
Create a matching set at different heights for visual interest. They’re ideal for:
– Bedside lamp placement
– Displaying small plants
– Holding your morning coffee
5. Stylish Serving Tray: Hostess Essential

Impress guests with a stunning serving tray that’s as functional as it is beautiful. Start with a basic wooden tray or make your own. After sanding, mix resin with summer-inspired colors and pour carefully. Add personal touches like:
– Monogram stencils
– Geometric patterns
– Metallic accents
Finish with food-safe sealant for worry-free entertaining. Your brunches will never be the same!
6. Plant Lover’s Stand: Greenery Showcase

Elevate your plant collection with custom stands. Choose earthy-toned chips that complement your greenery. Pour resin over wooden circles or squares, then attach hairpin legs for modern flair.
Create a tiered display with different heights. Perfect for:
– Showcasing favorite succulents
– Creating indoor garden corners
– Adding height to your plant arrangements
Your plants will thrive in style!
7. Entryway Key Holder: Organized & Beautiful

Turn clutter into art with a functional key holder. Choose a wood slice or rectangular board as your base. After creating your terrazzo surface, attach decorative hooks. Personalize with:
– Initial stencils
– Small decorative motifs
– Coordinating paint details
Hang near your entrance for a cheerful welcome home every day!
8. Ambient Candle Holders: Cozy Glow

Create magical lighting with handmade candle holders. Use silicone molds in various shapes from craft stores. Mix translucent resin with delicate chips for a subtle sparkle. After curing, place tea lights inside for a warm glow.
Beautiful for:
– Dinner table centerpieces
– Bathroom relaxation
– Patio evenings
The flickering light through terrazzo creates unforgettable ambiance.
9. Pretty Coasters: Practical Protection

Protect surfaces in style with custom coasters. Use plain tiles from home improvement stores. Pour resin mixed with colorful chips, then add cork backing when dry. Perfect for:
– Hostess gifts
– Book club essentials
– Personalizing your coffee table
Make coordinating sets for different seasons!
10. Statement Wall Art: Personalized Decor

Make blank walls come alive with terrazzo art. Use canvas panels or wooden boards as your base. Pour resin in sweeping patterns or geometric designs. Experiment with:
– Metallic flakes
– Layered colors
– Textured effects
Hang as a focal point in your living room or bedroom for instant personality!
11. Furniture Accents: Creative Touches

Refresh furniture with terrazzo details. Transform:
– Drawer fronts
– Stool seats
– Cabinet doors
Simply apply resin to sanded surfaces. This quick update gives old pieces new life with minimal effort!
12. Pet Bowl Upgrade: Stylish Feeding

Treat your furry friends to stylish bowls! Use stainless steel inserts with resin exteriors. Choose pet-safe resin and seal thoroughly. Personalize with:
– Your pet’s name
– Paw print designs
– Favorite colors
Makes feeding time more delightful!
13. Elegant Serving Board: Gather in Style

Serve snacks in style on custom boards. Choose hardwood bases and seal with food-safe resin. Beautiful for:
– Charcuterie displays
– Breakfast in bed
– Gift presentations
Your guests will admire your creativity!
14. Glowing Lampshades: Ambient Lighting

Create magical lighting with terrazzo lampshades. Use simple drum shades as your base. Apply translucent resin with delicate chips. When lit, they cast beautiful patterns. Perfect for:
– Bedside tables
– Entryway lighting
– Creating cozy corners
15. Unique Wall Clock: Functional Art

Combine art and function with a custom clock. Use a basic clock kit from craft stores. Create your terrazzo face, then assemble. Choose hands that complement your design. A perfect addition to:
– Kitchen walls
– Home offices
– Gallery walls
Conclusion

Now you’re ready to create stunning terrazzo pieces that bring joy to your home! These projects let you express your personal style while making functional art. Remember – there’s no “wrong” way to create. Gather friends for a crafting day, start with small projects, and most importantly, have fun making your space uniquely yours!