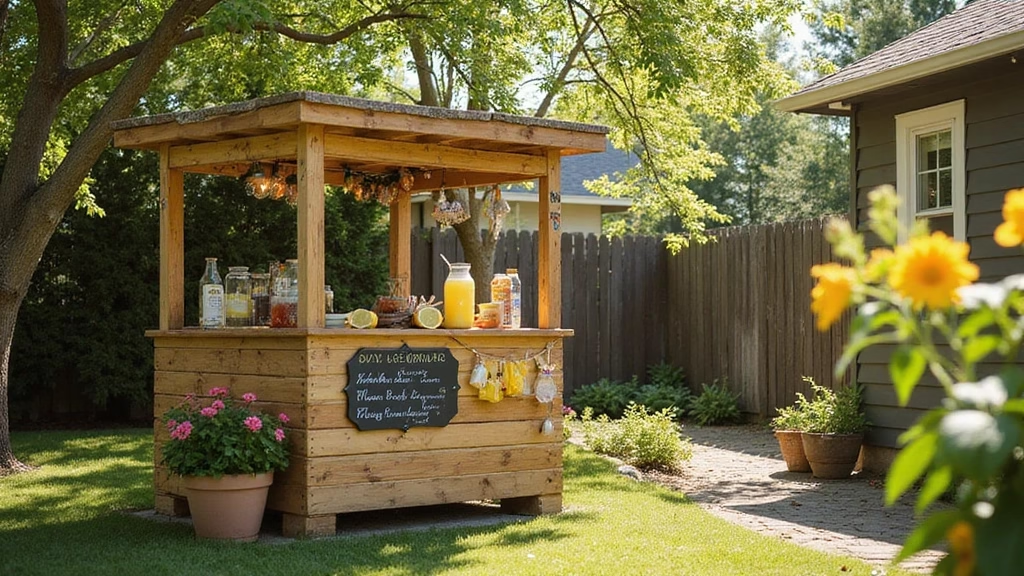
Imagine a sunny afternoon filled with laughter, the refreshing scent of citrus, and the sound of clinking glasses. A DIY lemonade stand, crafted from rustic pallets and adorned with a charming chalkboard menu, can transform your backyard into a vibrant gathering spot.
This project is more than just a lemonade stand; it’s a creative outlet that adds a splash of whimsy to your outdoor space. Perfect for summer days or family gatherings, this stand invites friends and neighbors to stop by for a refreshing drink. Let’s dive into the details and make your lemonade dreams come true!
Gather Your Materials: The Perfect Pallet Base

Before you build your lemonade stand, it’s essential to gather all the right materials. The star of the show is, of course, the pallets. Look for clean, sturdy pallets that aren’t damaged. Once you have your pallets, you’ll need some basic tools: a hammer, nails or screws, a saw, and a bit of sandpaper to smooth the edges.
Consider adding some wheels to make your stand mobile—perfect for moving it around the yard or even taking it to a neighborhood gathering. You’ll also want to invest in some weather-resistant sealant to protect your stand from the elements if you plan on leaving it outside.
Here’s a quick checklist for your materials:
– 2-3 wooden pallets
– Hammer or drill
– Nails or screws
– Sandpaper
– Sealant (optional)
– Paint (for added color)
Gathering materials beforehand ensures that you’ll have everything you need at your fingertips for a smooth build process.
Building the Stand: Step-by-Step Guide

Now that you have your materials ready, it’s time to roll up your sleeves and start building! Begin by laying two pallets flat for the base. Secure a third pallet vertically to serve as the back support. Use screws or nails to fasten them together, creating a sturdy structure.
Next, cut down the pallets to your desired height if needed. Remember, you want it to be accessible for kids and adults alike. Sand down any rough edges to prevent splinters.
Don’t forget about the countertop! You can use a piece of plywood or an extra pallet cut to size. Attach it securely to the top of your stand. For an eye-catching finish, you might want to paint your stand in bright colors or leave it natural for a rustic look.
Additional tips:
– Ensure that the stand is level to avoid spills.
– Consider adding hooks for cups or napkins.
– Personalize your stand with embellishments like bunting or string lights.
This is all about making the stand functional yet visually appealing, so let your creativity shine!
Creating Your Chalkboard Menu: Customize with Style

With your lemonade stand built, it’s time to create a menu that will entice customers! A chalkboard menu adds a classic touch and allows for easy customization. You can purchase a small chalkboard or paint a piece of wood with chalkboard paint.
To design your menu, write down the lemonade flavors you’ll offer—think classic lemon, strawberry twist, mint lemonade, and even fun options like lavender lemonade. Don’t forget to add prices and perhaps even some daily specials! Use colorful chalk to make it pop against the blackboard background.
Here are some unique chalkboard menu ideas:
– Use playful doodles to illustrate each flavor.
– Create a ‘Lemonade of the Day’ section for seasonal favorites.
– Consider adding fun facts about lemons or hydration tips!
This chalkboard menu not only serves its purpose but also becomes a part of your stand’s overall decor, adding charm and personality.
Taste Testing: Flavor Ideas for Your Lemonade

A lemonade stand isn’t complete without refreshing flavors that make customers come back for more! Start with the classic recipe: freshly squeezed lemon juice, water, and sugar. From there, you can get creative!
How about a refreshing strawberry lemonade? Just blend fresh strawberries into the classic mix for a fruity twist. Or try a mint lemonade by muddling fresh mint leaves before mixing in the lemon concoction. You can even add fun additions like ginger or sparkling water for a fizzy kick!
Here are some flavor combinations to consider:
– Lavender Lemonade: Infuse simple syrup with dried lavender.
– Watermelon Lemonade: Blend fresh watermelon and strain into your mix.
– Cucumber Mint: Add pureed cucumber and fresh mint for a refreshing drink.
Don’t forget to have taste tests with friends and family! Their feedback can help refine your perfect lemonade mix!
Decorating the Stand: Accessories that Shine

Once your stand is built and your menu is ready, it’s time to add some finishing touches that make your lemonade stand stand out! Decorative elements can transform a simple stand into something truly special.
Consider hanging up some fairy lights for an inviting glow as the sun sets. You might also include a vase of fresh lemons or sunflowers on the counter for a pop of color. Adding cute signs that say “Fresh Lemonade” or “Squeeze the Day” will draw attention.
Here are some accessory ideas:
– Use colorful bunting to add a festive vibe.
– Include a cooler filled with ice for instant refreshment.
– Create a small seating area with a picnic blanket and colorful pillows.
These little details will elevate your lemonade stand, making it not just a drink stop, but a charming feature of your outdoor space.
Engaging Everyone: A Family Project

Building a DIY lemonade stand can become a fantastic family project! It’s a chance to bond, unleash creativity, and teach kids the value of entrepreneurship. Involving everyone in the building process makes it more fun and educational!
Set up roles: kids can help with painting and decorating while adults manage the construction of the stand. You can even have a ‘business meeting’ to discuss pricing and marketing strategies. It’s a great way to teach kids about teamwork and responsibility while also making memories.
In this collaboration, consider these points:
– Assign age-appropriate tasks to encourage participation.
– Have fun with creative names for your lemonade stand.
– Plan a mini-marketing campaign with flyers or social media posts!
This project can become a cherished family tradition and perhaps even a summer ritual that brings everyone joy.
Sourcing Ingredients: Fresh and Local

The taste of your lemonade largely depends on the quality of your ingredients. Sourcing fresh, local lemons not only supports local farmers but also enhances the flavor of your drinks. Check out farmer’s markets or local fruit stands to find the best produce.
You can also get creative with the ingredients! For instance, using fresh herbs from your garden can elevate your lemonade to the next level. Mint, basil, or even rosemary can add intriguing flavors. Consider pairing fresh fruits like strawberries or peaches with your lemons to create delightful combinations.
Here are some sourcing tips:
– Visit farmer’s markets for the ripest fruits.
– Look for organic options for the best flavor.
– Experiment with seasonal fruits to keep your menu exciting.
The fresher the ingredients, the more delicious your lemonade will be! Plus, it feels great knowing you are supporting local businesses.
Pricing Your Lemonade: Tips for Success

When it comes to a lemonade stand, pricing is key! You want to ensure that your drinks are affordable yet profitable. Start by calculating your costs—consider everything from the ingredients to materials for the stand.
Research local trends to understand what others might charge. This can help you find a sweet spot that attracts customers while still covering your expenses. You might want to offer a small discount for bulk orders or create combo deals with snacks.
Here are some pricing insights:
– Keep prices simple; avoid cents for easier transactions.
– Consider your target audience; families will appreciate budget-friendly options.
– Don’t undervalue your hard work; make sure your prices reflect the quality of your lemonade.
Effective pricing can boost sales and increase satisfaction, making your stand the go-to spot for refreshments!
Marketing Your Stand: Spreading the Word

Getting the word out about your lemonade stand makes all the difference in sales! Utilize social media platforms to announce your new venture. Post enticing pictures of your lemonade, engaging graphics, and updates about your stand’s hours and location.
Creating a buzz is crucial—consider handing out flyers in your neighborhood or teaming up with local businesses for cross-promotion. You could even set a special opening day or offer discounts to create excitement!
Marketing tactics to try:
– Create an Instagram page dedicated to your lemonade stand.
– Host a ‘grand opening’ event with free samples.
– Encourage happy customers to share their experience online.
Remember, the more people know about your stand, the more likely they’ll stop by for a refreshing drink!
Running the Stand: Customer Interaction Tips

Running your lemonade stand is about more than just pouring drinks; it’s a chance to interact with customers and create a friendly atmosphere! A warm welcome and a genuine smile can go a long way.
Engage customers by sharing the story behind your stand or asking for their favorite lemonade flavor. Personal connections often lead to repeat customers! Always be prepared for customer feedback; it can help improve your offerings.
Key interaction tips:
– Maintain a clean and organized stand.
– Keep a friendly attitude; people love a positive vibe!
– Be open to suggestions; they might lead to new flavors or ideas!
These interactions can enhance the experience for both you and your customers, turning a simple drink purchase into a memorable moment.
Handling Supply and Demand: Keeping Up with Sales

As your lemonade stand gains popularity, you’ll need to manage your supplies wisely to keep up with demand. Monitor how much lemonade is being sold each day to adjust your ingredients accordingly.
If certain flavors are flying off the shelf, consider increasing their availability. Keep extra supplies on hand to prevent running out—nothing’s worse than disappointing eager customers!
Here are a few key strategies:
– Create a daily inventory list to track stock levels.
– Prepare extra batches of popular flavors during peak hours.
– Experiment with methods to streamline your service for busy times.
Being prepared will ensure that your stand remains a go-to spot, and happy customers will keep coming back for more!
End-of-Day Wrap-Up: Reflecting on Your Success

After a successful day at your lemonade stand, take some time to reflect on what worked and what could be improved. Consider keeping a journal to jot down daily sales, customer feedback, and any fun stories that arise during the day.
This reflection can help you plan for the next day and enhance your overall experience. Celebrate your accomplishments, whether big or small, and think about ways to improve for tomorrow.
End-of-day tips include:
– Clean and organize your stand for the next use.
– Review your finances and make adjustments if necessary.
– Plan exciting new flavors or promotions for the future!
These reflective practices will ensure that every day brings new opportunities and growth for your lemonade stand adventure.
Crafting New Memories: The Joy of DIY

Creating a DIY lemonade stand is more than just a project; it’s about crafting memories that’ll last a lifetime! Whether it’s the laughter shared while building, the many flavors experimented with, or the interactions with the community, every moment is special.
The joy of working together as a family, the satisfaction of serving your own creations, and the thrill of entrepreneurship are all part of this unique experience. Don’t forget to capture photos along the way to remember these moments!
Cherish the process, and it will inspire future DIY projects together. Who knows? This lemonade stand might just be the start of many more creative adventures ahead!
Final Thoughts: Embrace Your Creativity!

A DIY lemonade stand encapsulates creativity, fun, and a sense of community. From the planning stages to serving refreshing drinks, this project offers countless opportunities for self-expression and bonding. Encourage yourself to try new flavors, decorate in ways that reflect your personality, and invite others to share in this delightful experience.
Embrace the creativity flowing through every aspect of your stand, and let it shine! Whether it’s a summer project or a year-round endeavor, your DIY lemonade stand will not only quench thirsts but also hearts. Happy sipping!