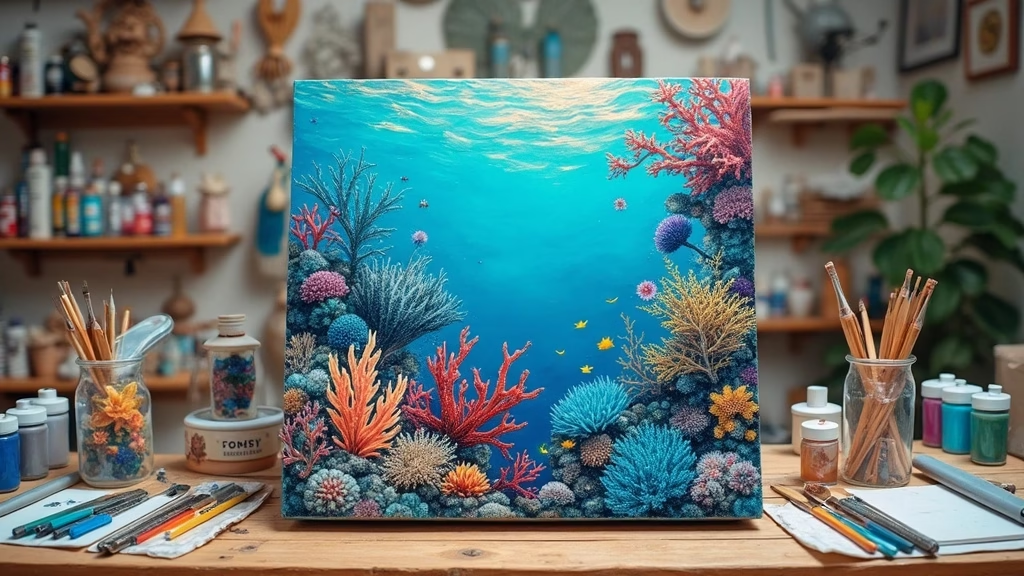
Bring the beauty of underwater worlds into your home with stunning DIY coral reef art! This vibrant and engaging project invites creativity and allows you to express your love for marine life. Using textured paint and resin techniques, you can craft unique pieces that are not just eye-catching but also a great conversation starter. Each artwork will be a reflection of your personality and style, making your home decor truly one-of-a-kind.
Dive into this playful journey of colors, textures, and creativity, as you learn how to create stunning coral reef art that captures the essence of ocean elegance. From the vibrant hues to the shimmering details, this project is perfect for art lovers and those looking to add a splash of creativity to their walls. Ready to unleash your inner artist? Let’s get started!
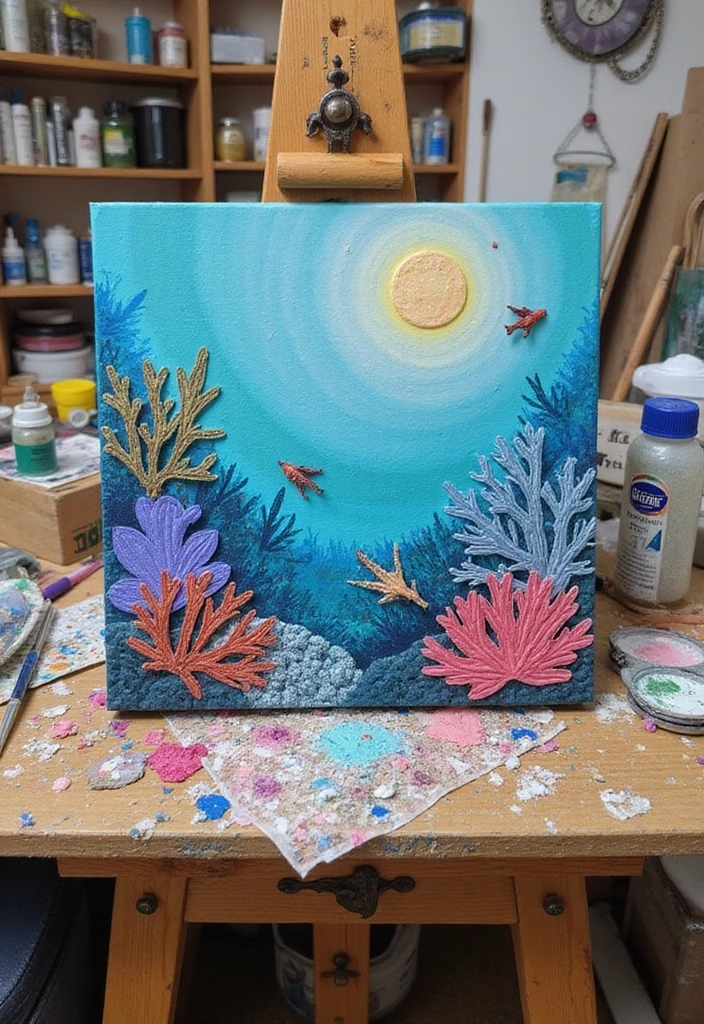
Understanding Textured Paint: The Foundation of Your Coral Reef Art
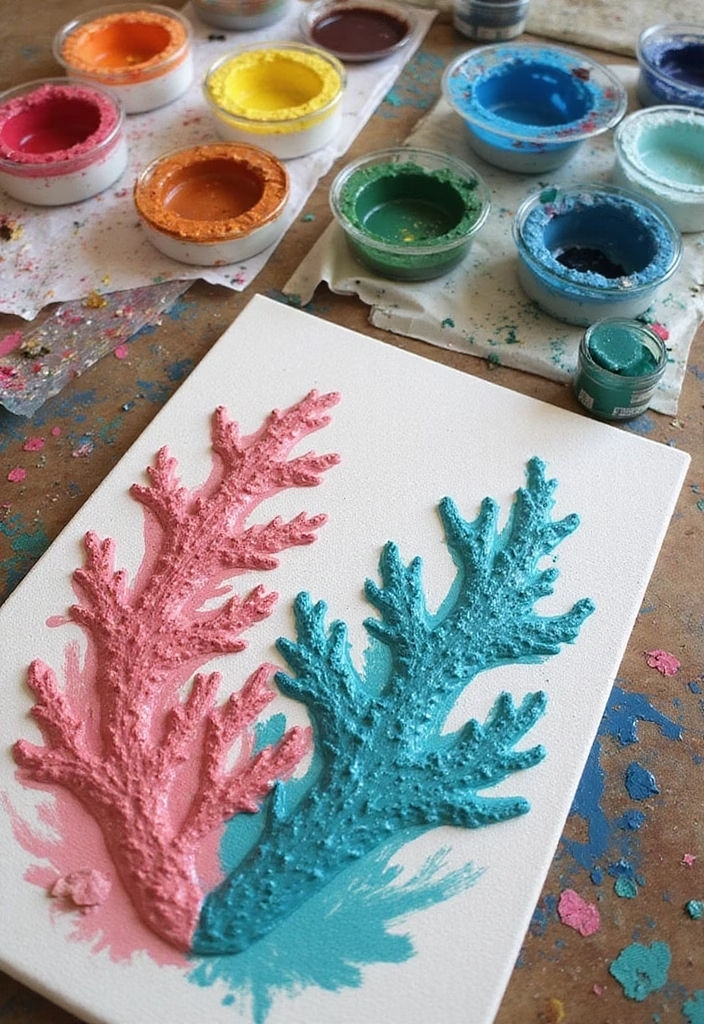
Textured paint is the magic ingredient that adds depth and dimension to your coral reef art. Unlike regular paint, textured varieties allow you to create stunning visual effects that mimic the intricate surfaces of real coral. You can choose from various textures, such as sand, sponge, or foam, each offering a unique touch to your masterpiece.
Begin by selecting a base color that resonates with marine tones—think sandy beiges, deep ocean blues, or vibrant coral reds. Next, incorporate texture by mixing in sand or using specialized textured mediums. Don’t hesitate to layer different colors to bring out the vibrancy of the corals, allowing the underlayers to peek through for an authentic feel.
Here are some tips to make your textured paint work shine:
– Experiment with various applicators like sponges or brushes for unique effects.
– Use palette knives to create raised areas that give your art an interesting touch.
– Don’t rush; take your time with layering for the best results.
With textured paint, your coral reef art will leap off the canvas, bursting with life and energy.
Resin Techniques: Adding Depth and Shine to Your Artwork
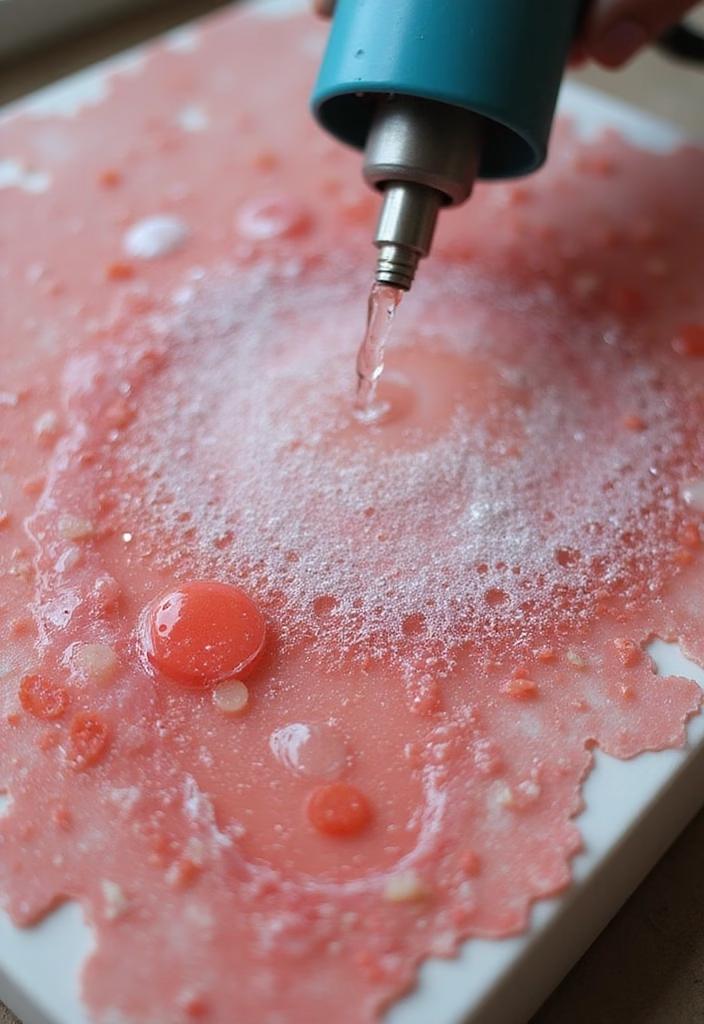
Resin techniques are where the magic happens! Adding resin to your coral reef art not only gives it a shiny, polished finish, but it also creates a sense of depth that makes your piece really stand out. With resin, you can encapsulate small shells, glitter, or even sea glass, turning your artwork into a three-dimensional piece of ocean wonder.
Start with clear epoxy resin, mixing it according to the package instructions. For a subtle hue, you can add a few drops of transparent dyes to achieve beautiful ocean colors. Pouring the resin over your textured paint creates a glossy layer that resembles the surface of the ocean when sunlight hits the water.
Here are some handy tips for working with resin:
– Always wear gloves and work in a well-ventilated area to stay safe.
– Use a heat gun to remove any bubbles that may form in the resin.
– Experiment with different pouring techniques to create waves or swirls in your piece.
Resin can elevate your coral reef art, making it look professional and eye-catching, perfect for any home decor.
Incorporating Natural Elements: Shells and Rocks
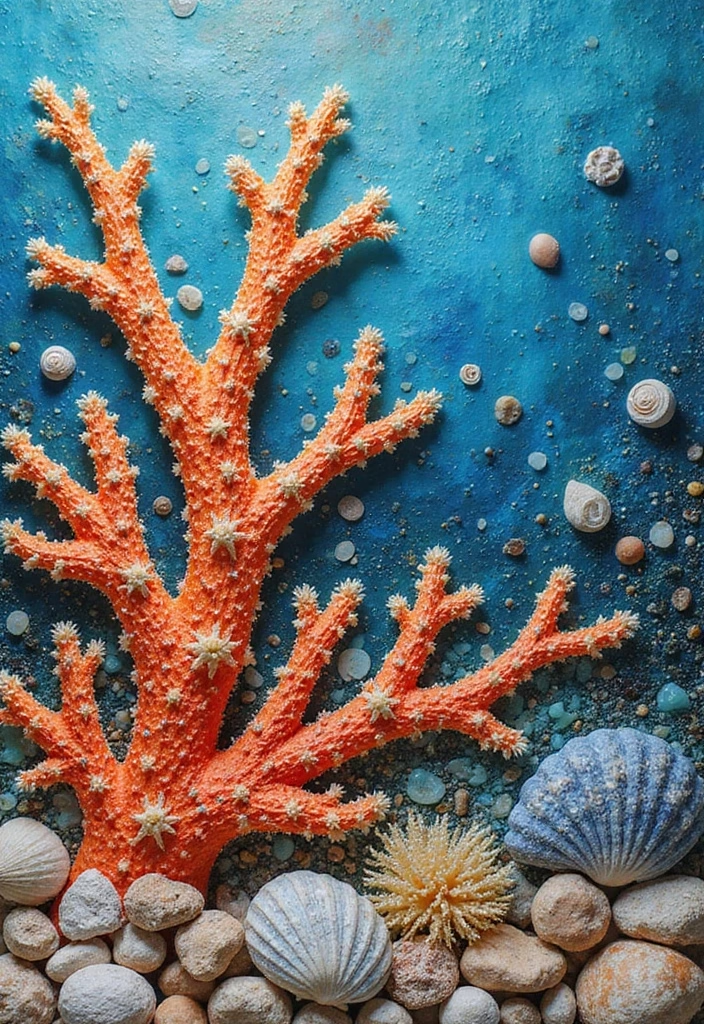
Adding natural elements like shells, pebbles, and coral pieces can take your DIY coral reef art to the next level. These additions create an authentic marine ambiance and enhance the tactile experience of your piece. Collecting shells from local beaches or sourcing them online can add a personal touch to your artwork.
When incorporating these elements, think about placement. Shells can be embedded within the layers of resin or glued to the surface for a more pronounced effect. Try grouping shells in clusters to mimic how they would appear in nature or place unique finds to act as focal points within your piece.
Here are some ways to integrate natural elements seamlessly:
– Use hot glue for quick application, or mix them into the resin for a more cohesive look.
– Consider the scale of the shells; larger shells can act as focal points, while smaller ones can fill spaces or add detail.
– Don’t be afraid to mix colors and textures—variety brings life!
Natural elements not only enhance your artwork but also tell a story, capturing the essence of ocean life right within your home.
Color Psychology: Choosing the Right Palette
The colors you choose for your coral reef art can have a significant impact on the overall feeling of your space. Different colors evoke different emotions, and understanding color psychology can help you create the perfect ambiance. Cool blues and greens bring calm and serenity, while vibrant corals and yellows can energize a room.
When selecting a color palette, consider the mood you want to convey. A mix of vibrant coral and turquoise can create a lively and cheerful atmosphere, perfect for a playroom or a bright living space. Alternatively, softer pastels might work well for a serene bedroom, promoting relaxation and tranquility.
Here’s how to effectively choose your color palette:
– Create a mood board with colors that inspire you.
– Use complementary colors to make certain elements pop.
– Test a small swatch on your canvas before committing to a color.
Understanding how colors interact will guide you in crafting a piece that not only looks good but feels right, making your home decor more inviting.
Creating Layers: Building Depth in Your Art

Creating layers in your DIY coral reef art adds complexity and intrigue to your piece. Each layer can tell a different story, mimicking how coral reefs are structured in nature, while also offering a dynamic visual experience. Start with the base layer of textured paint, allowing it to dry before adding additional layers with varying colors and textures to create depth.
Think about the design elements—foreground, mid-ground, and background. Use darker colors for the background and progressively lighter shades as you move to the foreground. This layering technique will give your artwork a three-dimensional feel and draw the viewer’s eye throughout the piece.
Here’s how to effectively build layers:
– Allow each layer to dry completely before adding the next to prevent muddy colors.
– Use different application techniques for each layer—brushes, sponges, or even pouring methods.
– Consider adding transparent layers of resin in between to enhance the depth.
Layering isn’t just about colors; it’s a creative way to bring your coral reef scenes to life, making them more engaging and visually appealing.
Finishing Touches: Sealing Your Artwork

Once you’ve crafted your stunning coral reef art piece, the finishing touches are essential to preserve its beauty and depth. Sealing your artwork with a clear coat not only enhances the colors but also protects your piece from dust, UV rays, and moisture. This final step ensures that all your hard work remains vibrant and intact over time.
Whether you choose a spray sealant or a brush-on varnish, make sure to follow the manufacturer’s instructions. Apply several thin coats instead of one thick layer to prevent drips and uneven gloss. Allow each coat to dry fully before adding the next to achieve a smooth finish.
Here are some tips for sealing your artwork:
– Choose a sealant that is compatible with both paint and resin.
– Test the sealant on a small area first to ensure it doesn’t alter the colors.
– Store your artwork in a safe place during the sealing process to avoid accidents.
By taking the time to seal your artwork, you’re ensuring that it will continue to shine and captivate for years to come.
Unique Presentation Ideas: Displaying Your Artwork

Once your coral reef art is complete, displaying it can be just as important as crafting it. The right presentation can elevate your artwork, turning it into a true focal point in your home. There are numerous ways to showcase your masterpiece, including framing, using easels, or even mounting it on a wooden board.
Consider creating a gallery wall with multiple pieces that share a common theme or color palette. This approach adds interest and allows viewers to appreciate the art as a cohesive collection. Alternatively, you can place a single statement piece above a mantle or in a bright hallway.
Here are some creative display ideas:
– Use floating shelves to create depth and highlight different art pieces.
– Hang your artwork with clips for an easy, casual look.
– Experiment with lighting; spotlights can draw attention and enhance colors.
Your coral reef art deserves to shine, and with the right display, it can become the highlight of any room, inviting admiration from friends and family alike.
Mixing Media: Combining Different Art Techniques
Don’t limit yourself to just paint and resin! Mixing different art techniques can lead to exciting and unexpected results in your coral reef art. Consider incorporating mixed media elements like fabric, paper, or even metal to add more texture and visual interest. This approach allows you to express your creativity freely and keeps the art process fun and engaging.
For example, you could use fabric to create soft coral shapes or paper cutouts to represent sea creatures. Incorporating various materials not only diversifies the look of your art but also tells a story through the materials you choose.
Here’s how to experiment with mixed media:
– Layer different materials on your canvas, adhering them with glue or resin.
– Use contrasting colors and textures to create a dynamic composition.
– Don’t be afraid to go bold; combining unexpected items can lead to stunning results!
Mixing media opens up a world of possibilities for your DIY coral reef art, making it truly unique and personalized.
Eco-Friendly Supplies: Sustainable Art Practices

As passionate creators, it’s essential to consider the impact of our materials on the environment. Choosing eco-friendly supplies for your DIY coral reef art not only helps protect natural resources but also promotes sustainable art practices. From non-toxic paints to biodegradable resins, there are many options to create beautiful art while caring for our planet.
When selecting paint, look for brands that offer low VOC (volatile organic compounds) options. These paints are safer for both you and the environment. For resin, consider using plant-based or water-based formulas that minimize harmful chemicals. Additionally, repurposing materials like old canvases or salvageable items can give new life to discarded objects, adding a unique touch to your artwork.
Here are some tips for sustainable art practices:
– Research brands committed to eco-friendly practices.
– Get creative with recycling materials you already have at home.
– Educate yourself on safe disposal methods for used supplies.
Creating beautiful coral reef art can go hand-in-hand with eco-conscious choices, making your art not just a reflection of your creativity but also a statement of your values.
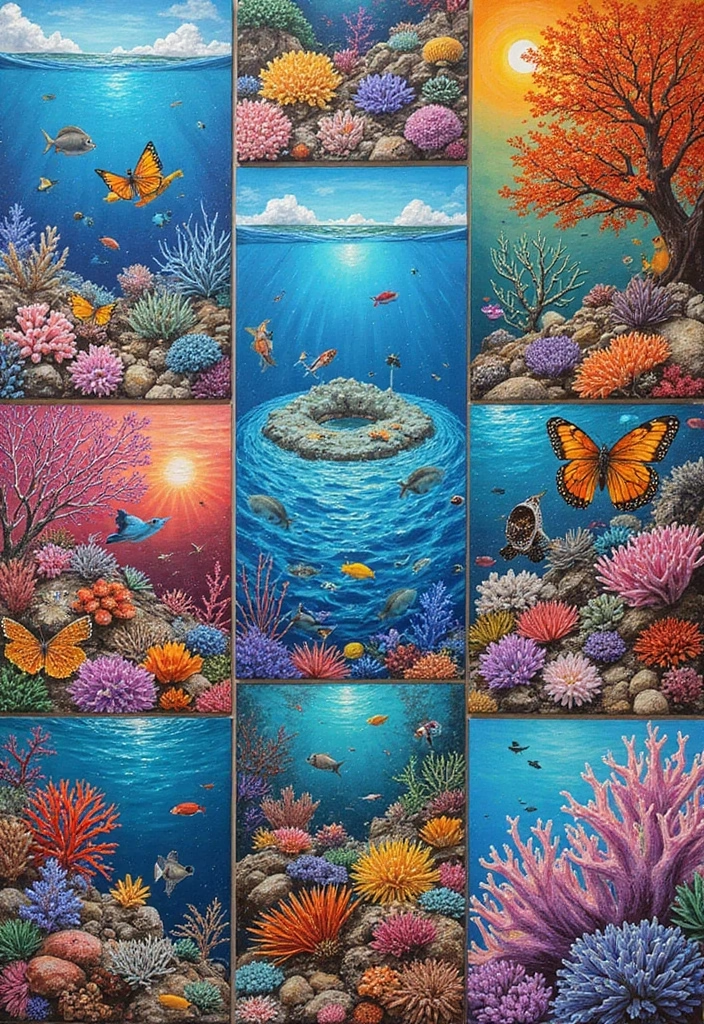
Inspiration from Nature: Finding Ideas Outside

Nature is the ultimate muse! When creating your DIY coral reef art, stepping outside to observe real coral and marine life can spark inspiration. Visit local aquariums, explore tide pools, or simply stroll along the beach to discover the incredible colors and shapes that nature has to offer. The textures of coral, the hues of fish, and the movement of water can guide your artistic choices.
Take photographs or sketch the patterns and colors you observe to use as references in your artwork. This connection to the natural world can deepen your creativity and lead to more authentic pieces that resonate with viewers.
Here’s how to draw inspiration from nature:
– Keep a nature journal with sketches, colors, and ideas.
– Look at coral reefs through an artistic lens—think about how you can interpret them.
– Don’t hesitate to use your own photographs as a base for your designs.
Engaging with nature will not only inspire your art but also create a meaningful connection between your creative process and the environment.
Hosting a DIY Art Workshop: Sharing Your Skills

Once you’ve honed your skills in creating coral reef art, why not share your passion with others? Hosting a DIY art workshop can be a rewarding experience, allowing you to share techniques and inspire budding artists to explore their creativity. Gather friends, family, or community members and create a fun, interactive session that encourages everyone to express themselves.
Prepare materials in advance, offering a variety of colors and textures to get everyone excited. Start with a demonstration of the techniques, explaining the process step by step. Encourage participants to experiment with their unique styles while providing guidance and support.
Here are some tips for hosting a successful workshop:
– Keep the group size manageable for personalized attention.
– Create a welcoming atmosphere with snacks or music to set the mood.
– Ensure everyone leaves with their own masterpiece!
Sharing your knowledge not only fosters creativity in others but also builds a community around art, making the experience even more enjoyable.
Personalizing Your Coral Reef Art

Personal touches can transform your DIY coral reef art, making it truly yours. Consider incorporating elements that reflect your personality—perhaps using colors that resonate with your style or adding initials or symbols that hold meaning for you. This customization not only makes the artwork more special but also invites viewers to connect with it on a deeper level.
You could also think about using photographs or memorable quotes that relate to your journey with art or your love for the ocean. These additions can create a narrative within your piece, allowing it to tell a story that extends beyond the visual.
Here are ways to personalize your coral artwork:
– Integrate names, dates, or locations that are significant in small, subtle ways.
– Use colors that you feel emotionally connected to.
– Think about adding textures or items that have personal meaning.
Personalizing your art creates a unique connection and makes it a conversation starter in any space.
Incorporating Quotes: Words that Inspire

Sometimes, a few meaningful words can add incredible depth to your artwork. Incorporating quotes into your DIY coral reef art can create a powerful message that resonates with viewers. These quotes can inspire or reflect your appreciation for the ocean, nature, or creativity, enhancing the emotional connection to your piece.
Choose quotes that speak to you personally, whether they’re from famous authors, poets, or even your own thoughts. You can hand-paint the text or use transfer methods to integrate it seamlessly into your design. Consider the placement—words can flow around coral shapes or be more prominent as a central focus.
Here are some tips for adding quotes:
– Experiment with different fonts and colors to complement your artwork.
– Use a stenciling technique for a clean and professional look.
– Ensure the text enhances rather than distracts from the visual elements.
Adding words to your coral reef art not only enriches the visual experience but also invites deeper contemplation, making it a perfect fit for your home decor.
Conclusion: Bringing Your Coral Reef Art to Life
Creating DIY coral reef art using textured paint and resin techniques is not just a crafting project; it’s an exciting journey of creativity and self-expression. With endless possibilities, you can transform your space with vibrant colors and textures that bring the beauty of the ocean into your home. Each piece becomes a personal story, reflecting not only your artistic journey but also your connection to nature.
As you experiment and explore your unique style, remember that the process is just as important as the final product. Keep creating, sharing, and enjoying your art, and don’t hesitate to inspire others along the way!